Fabric Sample Cards
My pattern portfolio includes several hundred fabric samples by now - how to keep track?
A small test print is made in advance of every pattern being published in my shop with the print-on-demand company Spoonflower. This allows me to check the motif sizes, correct colours, and the overall look of the pattern as well as indentifying possible repeat errors in the image file.
One half of each of these 15x15cm fabric squares I make into sample cards. This allows me to catalogue my portfolio for keeping track of my ever-growing pattern library and collections. The other half of the fabric I put in a box and save it for later, to be used in small sewing projects.
Here I'll give you a look behind the scenes at how my fabric sample cards are created. You can find more information and links to other blog articles on this topic at the end of this site !

Quite a lot of materials and individual parts in this one heap !
For my sample cards I need cardboard, paper, a glue stick and stapler. In addition, a pair of zigzag scissors for cutting fabric and a stack cutter for the cardboard sheets are very practical.
Another little extra is a small ink pad - you'll see later what that's used for.
First of all, I'll show you the central part of my sample cards: the fabric, of course !

Spoonflower’s “Fill-a-yard” design function is super practical for this project. Patterns from a pre-assembled collection can be filled into various grid arrangements over a length of one yard (approx. 96cm) and the width of a fabric (depending on the chosen type of fabric).
The smallest grid version consists of squares measuring approx. 15x15cm, which works spledidly for my needs.
This size of fabric samples is enough to examine my new patterns, but not too large because I don't want to create unnecessary waste.

A total of 164 small sample squares are spread across four yards of 100% cotton fabric. This fabric quality is an all-rounder that can be used for many small and large projects!
Small pieces of fabric are great for use in patchwork, and as material for making useful textile household helpers and decor.
As preiously mentioned, I will link a few sewing experiments in which I used leftover sample card fabric at the end of this page.

The first thing I'll always recommend to do with new fabrics is washing them ! This means that leftover textile auxiliaries and excess dye from the fabric production process are removed from the material.
Also important: cotton in particular shrinks by approx. 2 - 5% when washed, which means the fibres, and therefore the fabric, shrink slightly due to the moisture and temperature.

Of course you don't want any shrinking happening when a complex sewing project is already finished.
This can cause the fabric to distort unfavorably and a brand new item of clothing suddenly doesn't fit anymore.
Depending on the washing program and fibre material, the fabric will probably come out of the washing machine wrinkled.
Ironing will smooth that out easily !

Some remaining moisture from the washing comes in handy for ironing. This saves you from having to steam iron the wrinkled fabric afterwards.
It is best to iron on the left side of the fabric, which is the unprinted backside in case of a printed fabric.
A smooth fabric does not only look nicer for my sample cards, but it's also easier to cut and sew.

At this point I start checking for errors in the patterns. Here you can see the same pattern printed in two scales and placed next to each other.
Small details such as the finely dotted background quickly appear washed out on the surface of a woven or knitted fabric.
The smaller the scale and lower the color contrast, the more blurred the details appear!
In order to recognize this, the test prints on actual material are very valuable.
A finer fabric texture or larger scale of the print motifs could be possible solutions in this case.

A search picture to participate in - can you find the errors in these three patterns?
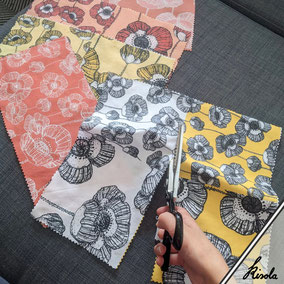
Some errors are tricky to notice in the image file of a pattern repeat, especially at the edges or in corners.
Here I missed a yellow area in the poppy bud that should be white.
The graphical pattern in grey tones was supposed to be lightened up with golden yellow rows of dots, but one grey dot was hidden at the edge of the repeat and I missed it when recoloring. In the blue stamp print, a fine hairline runs vertically through the fish and coral. The line is probably only one pixel wide, but still visible !

Another example of what I look out for is the actual colours of a print.
In digital printing, colours are optically mixed together from tiny droplets of subtractive CMYK colours (cyan, magenta, yellow and black). Many colours print very well this way, but not all of them. In addition, a print is different from the view on a PC monitor or other display device, because that one is displayed in additive RGB (red, green, blue).
On the fabric, the butterfly's head and antennae cannot be distinguished from the dark blue background, which came out almost black in print.
This pattern needs to be revised !
Everything is thoroughly checked, so now I get to start on preparing the fabric samples:
Cut with zigzag scissors, the fabric edges will not fray very much, even when handled frequently.
The sample cards are intended to be picked up often and should last as long as possible while still looking good.

Next comes my stack cutter!
By chance I found a sturdy kind of photo carton (300g/m²) in an art supply store that has a special format which incidentally is just perfect for my purposes.
The cardboard sheets are cut into strips just slightly wider than my pieces of fabric (that makes exactly four strips out of one sheet).

The cardboard strips are then folded over about 5cm or 2 inches at the top. The fabric sample will later be put in there and stapled in place.
Folding is a nice meditative activity, for example during my lunch breaks at work, or while listening to a podcast or audio book.

To label my cards, I created a form in which all specific information for each individual pattern can be entered.
This info includes the individual pattern number, title and repeat size.
There is also a box inteded to be ticked when I have released the design in my shop.
For more information about my pattern numbering system click here!

Now it's time for the mini ink pad !
A small stamp with my logo, the capital "K" from "Kisola", in old German cursive was made from a leftover piece of lino cut material.
Well, unfortunately I forgot to mirror the image in my first attempt, but who doesn't love a bit of trial and error?
In any case, I think the unique look of every hand-stamped logo on the fabric cards is very nice, which is why I don't let my printer do that job.

I like to prepare a number of cards from each cardstock colour in bunches.
To do this, an entire block of photo cardboard is cut, folded, glued and stamped in one go.
I them put fabric samples that belong together (like collections) in cardboard cards of the same colour so that they match each other and are easier to find in my sample card boxes afterwards.

Thanks to the prepared cards, I can start at any time with the penultimate step, which is attaching the fabric samples with my small stapler. Efficient and fast!
I sort all the size variations of one pattern on top of each other, to save on cardboard cards. The fabric samples, attached only on one end, can be picked up and touched for a closer look and feel.

The very last thing to do is labeling my fabric samples in the form I mentioned.
The pattern number in particular helps me sort and catalog the cards.
So far, all the labels have been written in pencil because my system changed a few times and is not yet fully developed. This way I can still easily make changes if I come up with practical alterations.

Not very elegant, but practical:
My finished sample cards are currently stored vertically in some old - but sturdy - boxes. I'm sure I'll find a nicer way, but that's a project for another day !
There are small labeled strips of cardboard in between the cards to mark the more extensive pattern collections. This way, they can be found quickly.
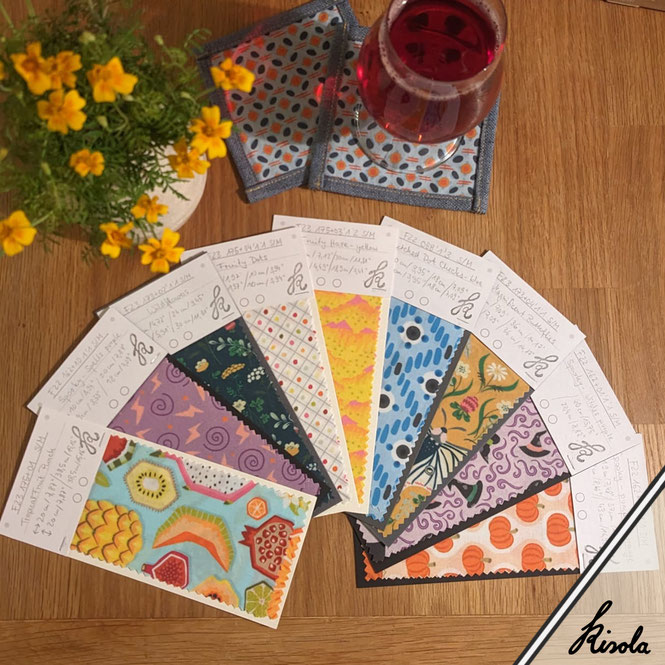
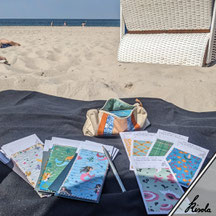
Finally, here are some of my most recent sample cards I had just created when I was gathering the photos for this article.
Aside from catalogueing my patterns, I originally started making the sample cards as a way to showcase my swatches in photos. Of course, it's also possible to create a digital mock-up, but I think the actual fabric material will always look a bit different in texture and colour, so it gives a better impression than a digital solution.
The sample cards are also super practical for finding new pattern combinations. To do this, I simply place them in groups and swap around until I find a nice set.
Or I might see a “gap” in existing compilations and get new ideas for coordinates or blender patterns of an existing collection.
I'm planning further articles with information on building a collection this way, and about using my sample cards in small photo shoots for marketing purposes. When available, I'll link them here.
Further articles on my small sewing and decoration projects using leftover fabric that I mentioned earlier can be found below.
Feel free to take a look !