
Spooky Part III - Quilting of the Spooky Quilt
Welcome to the continuation of the documentation for my Spooky quilt project. This section is about the eponymous quilting - i.e. putting together the patchwork of fabrics with my spooky patterns (Part 1 - Sewing the Patchwork) and the experimentally dyed backing fabric (Part II - Ice Dye).
This is the essential part will create a cozy blanket from individual layers of material!

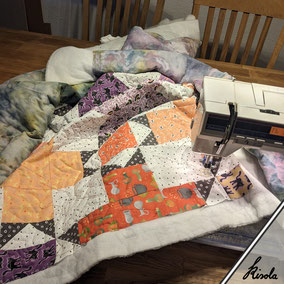
I start with three layers of material - the sewn patchwork, the dyed fabric for the back and a volume fleece, which will be the middle layer. For this blanket I chose a cotton fleece with around 80 g/m².
Depending on the fibre type and weight of the fleece, the quilt will either be heavier and more warming or very light-weight and fit for summer snuggles. When everything is sewn together, this material also creates the typical quilted quilt look.
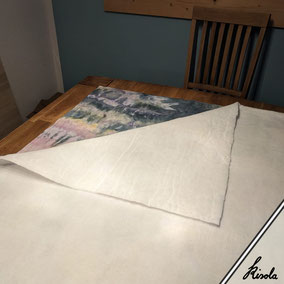
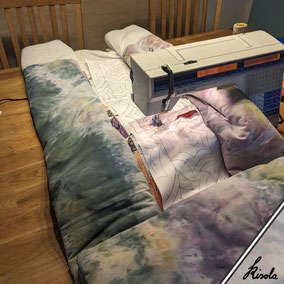
The three layers I mentioned now have to be placed carefully and smoothly on top of each other. This requires a large, flat surface, such as a wide bit of clean floor or, in my case, our big dining table.
I start with the dyed fabric, as that one is easiest to spread out. A bit of ironing can also help with that.
The fleece then goes over it, aligned on the middle points of each side of the materials.
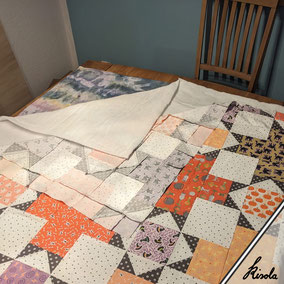
Next, the patchwork goes on top, and I again orientated it on the midpoints of the sides of all layers in order to place them directly on top of each other. Moving too much afterwards will distort the layers and can lead to wrinkles in between them that might then be discovered at a later point when they are harder to fix.
Better safe than sorry, it's easier to start this step again if it doesn't work well and to smooth everything out again and re-check!
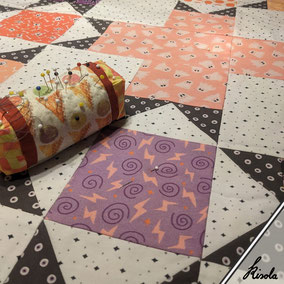
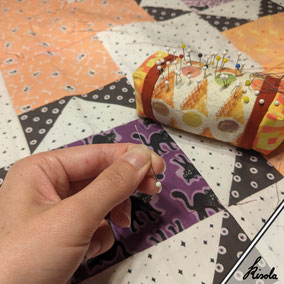
In order to keep all three layers in their position that was so much hard work to get them into, the so-called “basting” comes into play. There are various methods for doing this, the easiest being safety pins, with which the layers are simply stapled together.
Unfortunately, I have lost mine somewhere in a box during our last move. Using simple pins for basting is no fun at all, let me tell you, and you fingers will thank you for not trying. But they are now a temporary solution to test out another alternative. . .
. . . sewing the layers together!
With lockstitches through all layers, at intervals of approximately 10 - 20 cm, they get fastly attached to each other.
The whole process takes a little longer now, but you can't poke and scratch your fingers on the pins later and you can sew over the thread without any problems or damage to your sewing machine.
A perfect opportunity for me to try and learn something new. (And I have to say I will definitely do hand-sewn basting all the time now!)

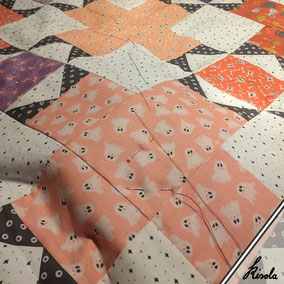
It is best to work from the center and out towards the edges and corners of the "quilt sandwich". This way you can check the layering again and smooth out any wrinkles in the fabric towards the edges.
I followed the square grid of my patchwork blocks to place my stitches evenly. The whole thing doesn't have to look pretty at all, it's just about functionality.
It's best to use a smooth yarn in a contrasting color so that you don't have to strain your eyes too much when you remove it in the end.
Very important - remove all pins when done basting, otherwise you will have a big chance for ouchies on your fingers when sewing. I can't count how many times I've pricked and scratched my fingers all over the place because of these nasty little things!
(Even though they certainly have their place as useful sewing aids.)
Is everything safely sewn together?
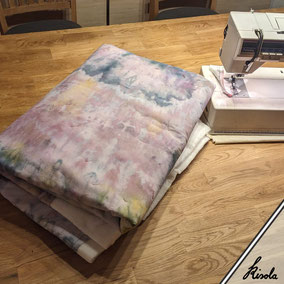
Now the sandwich of layers can be folded neatly and set aside if a break in the project is necessary. Nothing will slip now!
You also have to choose a quilt pattern, matching thread and getting the sewing machine ready to sew before you can continue.
I start by preparing my sewing machine for quilting.
Since I don't want to sew in simple straight seams this time, but rather use free motion quilting, I need a so-called "walking foot". This presser foot, unlike a normal foot, will not permanently compress the fabric together, but will only press on it periodically as the needle pushes into the fabric.
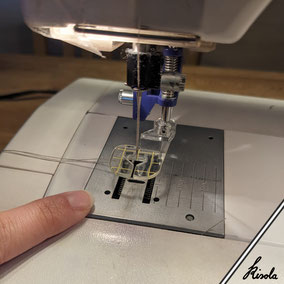
I also have to turn off the fabric transport on the machine. There is a switch on my Husqvarna Orchidea that allows me to easily lower the feed dog.
This now gives more control over the movements of the fabric and free control over the stitch length in the seam. The setting for stitch length on thr machine can now be set to zero to help with this.

Another important point is the choice of thread - it is best to choose the color based on individual threads rather than checking out the entire cone of thread against the fabric colour. I also test different places in the patchwork.
In my case, I think a white thread has too much contrast on dark fabrics and the gray yarn looks too dark on white fabric. That's why I choose the beige yarn.
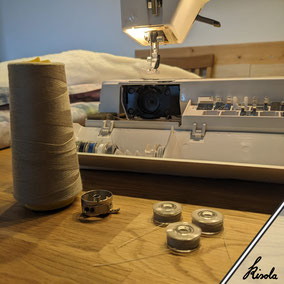
I always make it a point to prepare several bobbins of sewing thread before starting to quilt! Especially if the entire quilt is already hanging in the sewing machine, only replacing a bobbin is easier than having to rewind one.
In total I used up eight bobbins for this quilt! Of course, the number depends on the density of the seams and size of the quilt.
Before we get started, there comes a little sewing test. Here you can see how the upper thread pulls a lot in the curves and points. Either the tension of the upper thread is too high or the bobbin thread is too loose.
For a pretty and even seam, it is important to coordinate the tensions.
Now we can almost get to the actual quilting! Last thing missing is a pattern to follow with the quilt seams.
For quilting I chose a thematically matching spider web pattern for my project. I optimized the repeat digitally and found a good size for the motif through a few test prints.
Ideally, the seams should not be too close together and not too far apart. I like to use about 3 to
A motif made up of an endless line is easiest to sew, so you don't have to stop in between and take care of loose threads afterwards.

Now all you have to do is get the pattern onto the fabric somehow. . .
To achieve this, you can use fabric marking pens or small leftover pieces of hand soap to draw marks, or printed paper templates to sew on top of - to name just some examples.
I didn't know this at the time, but all three methods will be used one after the other in this project..
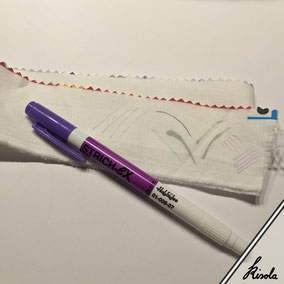
Some marker pens can be washed out, some are made to disappear on their own over a set period of time.
The pens in my possession are very old and I don't have any instruction sheets for some of them anymore. So I don't really trust them and first do a few test marks on a scrap of fabric.
Let's see what happens to the lines. In the meantime, I'll start with the paper template method.
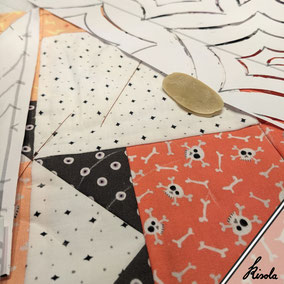
A few more print-outs of the pattern on copy paper are now pinned in a row to the center of my layered and basted quilt sandwich.
I attached the paper with pins.
The sides of the sandwich are neatly rolled up, so that all the material fits underneath the sewing machine. The bottom edge is also folded in for now, to make this mountain of material more manageable.
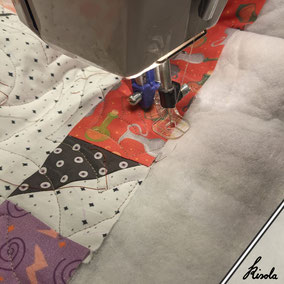
Now let the sewing begin!
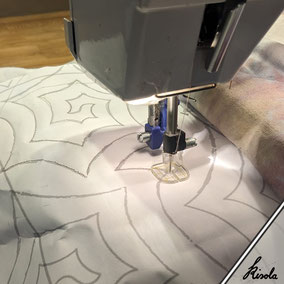
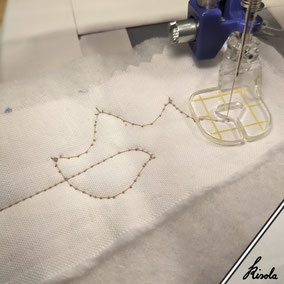
The print on the paper offers a very clear line that can be easily followed with a freemotion seam.
The beginning of my sewing was a bit shaky in stitch length and direction, because both are controlled completely by hand. I could have done a test piece, but you know . . .
A disadvantage of the paper itself is that it has to be pierced by the needle over and over. A thinner silk paper could work better, but the needle will still become blunted.
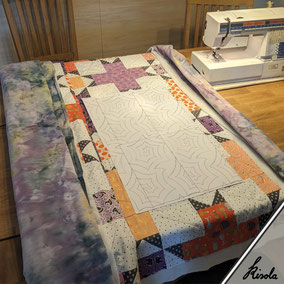
There's a lot of fabric that has to be maneuvered around under the sewing machine! And it would take a lot of paper to cover the whole quilt:
For only one row of quilting across the width of the format I need five sheets. There are then six rows next to each other from the middle to each edge.
That means at least 60 sheets of used-up paper!
And also . . .
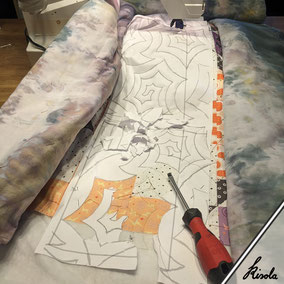
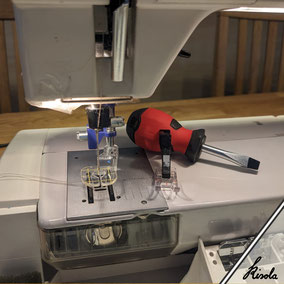
. . . the paper still has to come off again in the end. Using my fingers and a blunt screwdriver, I carefully tested removing the paper after sewing. At this point it (again) turns out that a thinner material would be better to work with.
Above all, not only does the spider web quilting of one row took an hour, but also fumbling with the paper took another hour.
Deceleration with all due respect, but there has to be a better way.
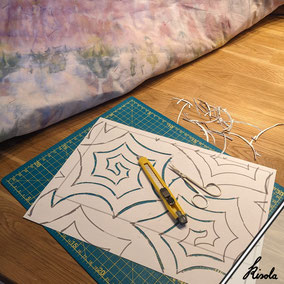
By using a different method, from now on I only need one more sheet of paper which I cut into a stencil.
I had to mend several times during the quilting process, but I was admittedly very happy with the material efficiency.
Using a cutter and a cutting mat, I cut out the lines into lanes, each of them about 2 - 3 mm wide.
The stencil can now be used for drawing the spiderweb pattern directly on the fabric
So now to the first marking method, drawing with a piece of soap.
I learned this trick from a master tailor. It's pretty neat to use because the soap leaves traces on the fabric, but can easily be washed out afterwards and, unlike tailor's chalk - which would of course also work - it leaves no dust (my asthmatic lungs are happy about that) and the lines do not smudge as easily.
The lines of light colored soap are very easy to see on dark fabric. . .

. . . unfortunately not quite so good on white fabric. To be honest, it's almost not at all visible.
I'm not using a white soap, it's actually greenish, but the markings are still very light in colour and hard to see, except for a shiny sheen in some places.
For now I'm struggling through with this method and have the template lying right next to me as a guide.
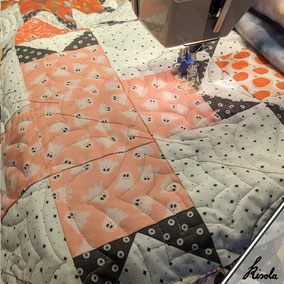
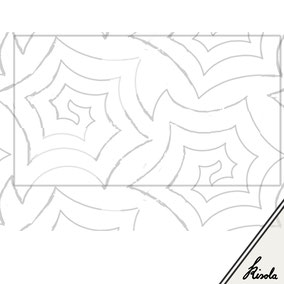
Here you can see a preview of what the finished Spooky quilt will look like.
The quilt seams are placed together row by row, always five and a half spiderweb motif repeats from edge to edge of the quilt.
When quilting, it is most convenient to choose the shortest possible distance, in my case of a rectangular quilt that is the width of the format.
I'm really excited to keep on quilting!
After a longer break from working on the quilt, I swapped in a new bobbin and the thread tension got a little mixed up.
Since undoing seams is annoying and takes a lot of time, it's worth to always keep an eye on the seams as you sew. If only I had done that a bit more carefully!
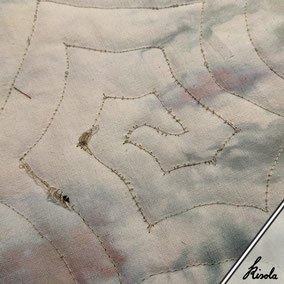
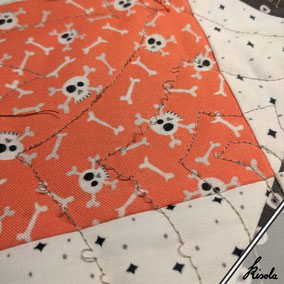
Errors can also occur on the backide of the quilt, for example like these small knots due to a broken thread that got tangled in the seam.
The loose upper thread from the previous picture can also be seen in this case, as small loops, the lower thread lies loosely between them.
At least this mess can be unraveled rather quickly . . .

But the beautiful sight of the quilt seams on the dyed backing fabric makes up for the delay and effort, ini my opinion.
At this point I was really glad I didn't choose a simple check pattern of straight seams, but rather went for free motion quilting!

After a while (and a few mistakes made) I got a bit tired of the soap markings because as mentioned the drawn lines are really difficult to see in the large, white fabric areas.
So I decided to use one of the marker pens after alll. The lines on the test fabric had disappeared, after less time than what was written on the pen (probably due to its age).
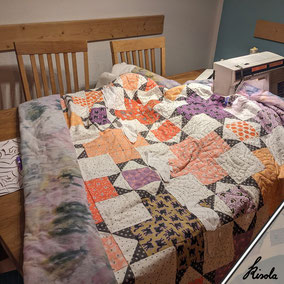
With the clearly visible marks from using the stencil and marking pen, quilting now progresses much faster. Starting right next to the row of paper-method-seams, a few more rows have already been done next to each other.
The large dining table turned out to not only be very practical for layering the materials in the beginning, but also for quilting.
Every time a seam reaches the edge of the quilt and cuts into the spiderweb quilt motif, the continuous line of the seam has to be changed and improvised a bit.
However, the edge can be easily secured by sewing directly along the edge in some small sections.
For drawing and sewing it now takes me about an hour to an hour and a half per row of quilting motifs.
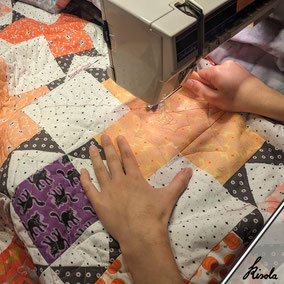
The fabric sandwich has now been rotated by 180 degrees and I'm quilting the second half of the format, again starting from the center and working towards the edge.
The fabric is guided under the machine with both hands. My right hand firmly grasps a fold to pull and the left one, laid flat, I can use to push the material forward.
What a load of material! But do you see anything else in this picture?
I finally reached the very last corner of the quilt!
Even though it was really tiring at times, I'm a little sad that the quilting part of this project is now already over and done.
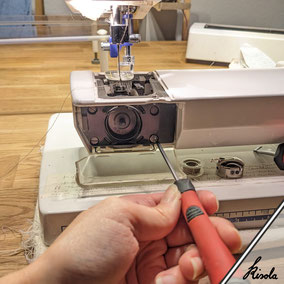
When the last seam is done, the first thing I do is taking care of my trusty sewing machine with a basic cleaning.
After any major project, it is important to remove all fiber residue, dust and leftover threads. Depending on the design type, there is also information about this in the operating instructions.

What a long section!
I didn't expect so many experiments during this part of the project, but I learned a lot and had fun tinkering around.
Actually, there isn't much left to do now until the quilt is finished. Unfortunately, for technical reasons, I cannot add any further content to this page, so there will be another part for the Spooky project.
For now this third part ends with a picture of the quilted front and back side of the quilt-in-progress. I'm very happy with how the spider web pattern turned out, even if not every little detail came out perfect and my seams are a bit shaky here and there.
Free motion quilting definitely takes some practice, but practice after all makes perfect!
There will be a new article for the fourth and final phase of the project Spooky quilt.
In the meantime, should you fancy starting a new project yourself, I'd be delighted if you check out my patterns!
My pattern collection "Spooky" is available as digital prints on yardage of various different fabric qualities on Spoonflower, also in other colour variations and with many more matching coordinate patterns in a spooky autumn mood.
